Arguably one of the most highly regarded and widely used enterprise-level operating systems available today is the Red Hat Enterprise Linux (typically shortened to RHEL and pronounced rell) distribution. Not only is it considered to be among the most stable and reliable operating systems, it is also backed by the considerable resources and technical skills of Red Hat, Inc. Red Hat Enterprise Linux 9 Essentials is designed to provide detailed information on the installation, use, and administration of the Red Hat Enterprise Linux 9 distribution. For beginners, the book covers topics such as operating system installation, the basics of the GNOME desktop environment, configuring email and web servers, and installing packages and system updates using App Streams. Additional installation topics, such as dual booting with Microsoft Windows, are also covered, together with all important security topics, such as configuring a firewall and user and group administration.
For the experienced user, topics such as remote desktop access, the Cockpit web interface, logical volume management (LVM), disk partitioning, swap management, KVM virtualization, Secure Shell (SSH), Linux Containers, and file sharing using both Samba and NFS are covered in detail to provide a thorough overview of this enterprise class operating system.
Superuser Conventions
RHEL 9, in common with Linux in general, has two types of user account, one being a standard user account with restricted access to many of the administrative files and features of the operating system and the other a superuser (root) account with elevated privileges. Typically, a user can gain root access either by logging in as the root user or using the su – command and entering the root password. In the following example, a user is gaining root access via the su – command:
[neil@demo-server ~]$ su -
Password:
[root@demo-server ~]#
Note that the command prompt for a regular user ends with a $ sign while the root user has a # character. When working with the command line, this is a useful indication as to whether or not you are currently issuing commands as the root user.
If the su – command fails, the root account on the system has most likely been disabled for security reasons. In this case, the sudo command can be used instead, as outlined below.
 |
You are reading a sample chapter from Red Hat Enterprise Linux 9 Essentials. Buy the full book now in eBook or Print format.
Includes 34 chapters and 290 pages. Learn more. |
Using sudo, a single command requiring root privileges may be executed by a non-root user. Consider the following attempt to update the operating system with the latest patches and packages:
[neil@demo-server ~]$ dnf update
Not root, Subscription Management repositories not updated
Error: This command has to be run under the root user.
Optionally, user accounts may be configured so that they have access to root-level privileges. Instead of using the su – command to first gain root access, user accounts with administrative privileges are able to run otherwise restricted commands using sudo:
[neil@demo-server]$ sudo dnf update

We trust you have received the usual lecture from the local System
Administrator. It usually boils down to these three things:

    #1) Respect the privacy of others.
    #2) Think before you type.
    #3) With great power comes great responsibility.

[sudo] password for neil:
Updating Subscription Management repositories.
.
.
To perform multiple commands without repeatedly using the sudo command, a command prompt with persistent super-user privileges may be accessed as follows:
[neil@demo-server]$ sudo su -
[neil@demo-server]#
The reason for raising this issue so early in the book is that many of the command-line examples outlined in this book will require root privileges. Rather than repetitively preface every command line example with directions to run the command as root, the command prompt at the start of the line will be used to indicate whether or not the command needs to be performed as root. If the command can be run as a regular user, the command will be prefixed with a $ command prompt as follows:
$ date
If, on the other hand, the command requires root privileges, the command will be preceded by a # command prompt:
 |
You are reading a sample chapter from Red Hat Enterprise Linux 9 Essentials. Buy the full book now in eBook or Print format.
Includes 34 chapters and 290 pages. Learn more. |
# dnf install openssh
Opening a Terminal Window
If you are using the GNOME desktop and need to access a command prompt, you will need to open a Terminal window. To do this, either press the keyboard Windows key or click on the Activities button in the top left-hand corner of the screen, then select the Terminal from the dash as shown in Figure 1-1:

Editing Files
Configuring a Linux system typically involves editing files. For those new to Linux, it can be unclear which editor to use. If you are running a terminal session and do not already have a preferred editor, we recommend using the nano editor. To launch nano in a terminal window enter the following command:
# nano <file>
Where <file> is replaced by the path to the file you wish to edit. For example:
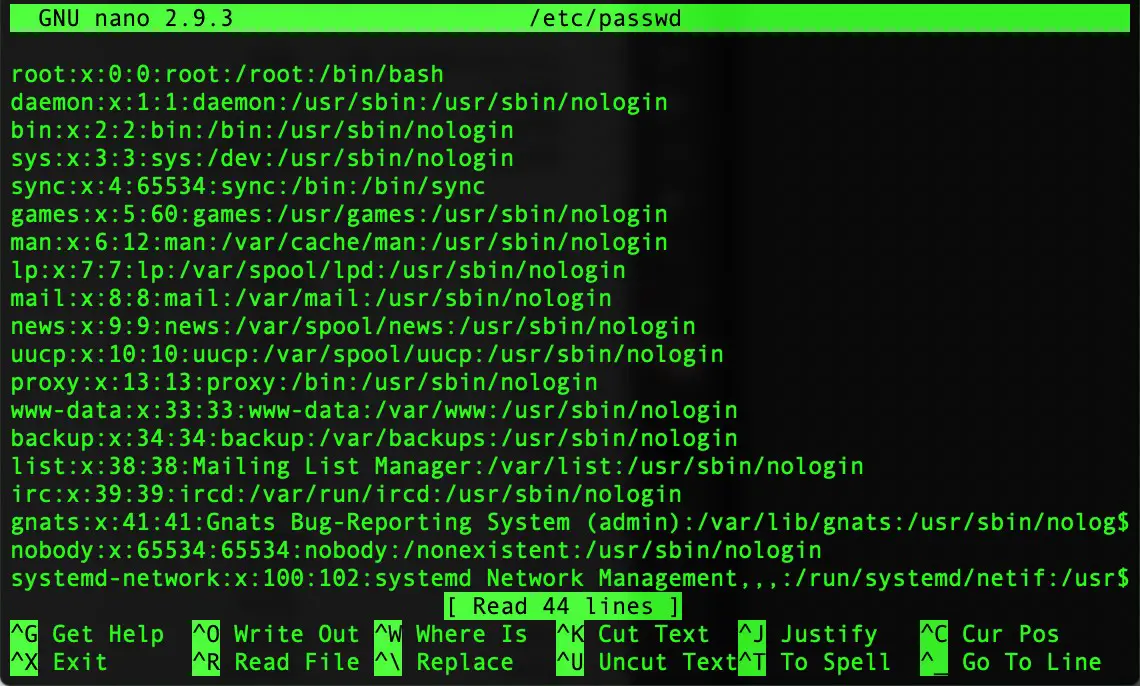
# nano /etc/passwd
Once loaded, nano will appear as illustrated in Figure 1-2:

To create a new file, run nano as follows:
 |
You are reading a sample chapter from Red Hat Enterprise Linux 9 Essentials. Buy the full book now in eBook or Print format.
Includes 34 chapters and 290 pages. Learn more. |
# nano
When you have finished editing the file, type Ctrl-S to save the file, followed by Ctrl-X to exit. To open an existing file, use the Ctrl-R keyboard shortcut.
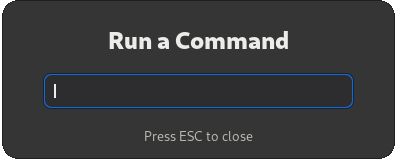
If you prefer to use a graphical editor within the GNOME desktop environment, gedit is a useful starting point for basic editing tasks. To launch gedit from the desktop, press Alt-F2 to display the Enter a Command window as shown in Figure 1-3:

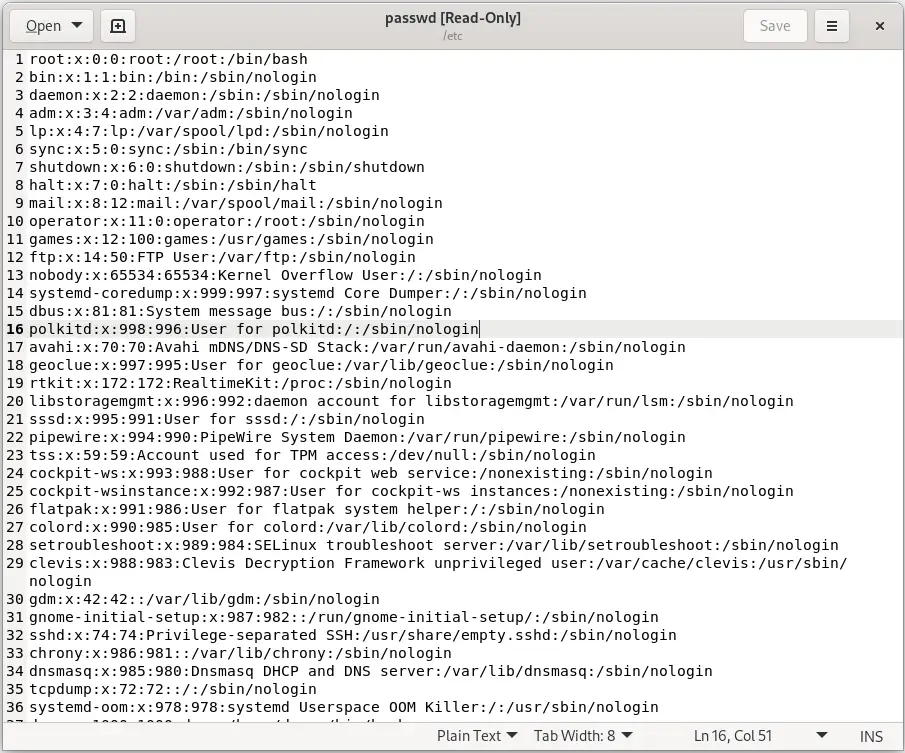
Enter gedit into the text field and press the Enter key. After a short delay, gedit will load ready to open, create and edit files:

Alternatively, launch gedit from a terminal window either with or without the path to the file to open:
# gedit
# gedit /etc/passwd
Feedback
We want you to be satisfied with your purchase of this book. If you find any errors in the book or have any comments, questions, or concerns, please contact us at [email protected].
 |
You are reading a sample chapter from Red Hat Enterprise Linux 9 Essentials. Buy the full book now in eBook or Print format.
Includes 34 chapters and 290 pages. Learn more. |
Errata
While we make every effort to ensure the accuracy of the content of this book, it is inevitable that a book covering a subject area of this size and complexity may include some errors and oversights. Any known issues with the book will be outlined, together with solutions, at the following URL:
https://www.ebookfrenzy.com/errata/rhel9.html
In the event that you find an error not listed in the errata, please let us know by emailing our support team at [email protected].
