Touch sensors are now built into many Android devices to identify the user and provide access to the device and application functionality, such as in-app payment options using fingerprint recognition. Fingerprint recognition is just one of several authentication methods, including passwords, PINs, and, more recently, facial recognition.
Although only a few Android devices currently on the market provide facial recognition, this will likely become more common in the future. In recognition of this, Google has begun to transition away from a fingerprint-centric approach to adding authentication to apps to a less specific approach called biometric authentication.
This chapter provides an overview of biometric authentication and a detailed, step-by-step tutorial demonstrating a practical approach to implementing biometric authentication within an Android app project.
An Overview of Biometric Authentication
The key biometric authentication component is the BiometricPrompt class. This class performs much of the work that previously had to be performed by writing code in earlier Android versions, including displaying a standard dialog to guide the user through the authentication process, performing the authentication, and reporting the results to the app. The class also handles excessive failed authentication attempts and enforces a timeout before the user can try again.
The BiometricPrompt class includes a companion Builder class that can be used to configure and create BiometricPrompt instances, including defining the text that is to appear within the biometric authentication dialog and the customization of the cancel button (also referred to as the negative button) that appears in the dialog.
The BiometricPrompt instance is also assigned a set of authentication callbacks that will be called to provide the app with the results of an authentication operation. A CancellationSignal instance is also used to allow the app to cancel the authentication while it is in process.
With these basics covered, the remainder of this chapter will implement fingerprint-based biometric authentication within an example project.
Creating the Biometric Authentication Project
Select the New Project option from the welcome screen and, within the resulting new project dialog, choose the Empty Views Activity template before clicking on the Next button.
Enter BiometricDemo into the Name field and specify com.ebookfrenzy.biometricdemo as the package name. Before clicking on the Finish button, change the Minimum API level setting to API 29: Android (Q) and the Language menu to Kotlin.
Configuring Device Fingerprint Authentication
Fingerprint authentication is only available on devices containing a touch sensor and on which the appropriate configuration steps have been taken to secure the device and enroll at least one fingerprint. For steps on configuring an emulator session to test fingerprint authentication, refer to the chapter Using and Configuring the Android Studio AVD Emulator.
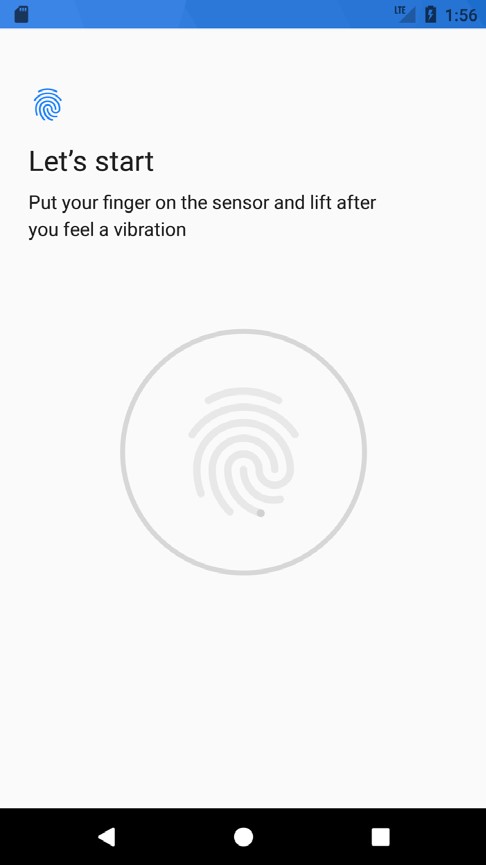
Configure fingerprint authentication on a physical device by opening the Settings app and selecting the Security option. Within the Security settings screen, select the Fingerprint option. Tap the Next button on the resulting information screen to proceed to the Fingerprint setup screen. Before fingerprint security can be enabled, a backup screen unlocking method (such as a PIN) must be configured. If the lock screen is not secured, follow the steps to configure PIN, pattern, or password security.
With the lock screen secured, proceed to the fingerprint detection screen and touch the sensor when prompted lock screen secured, proceed to the fingerprint detection screen and touch the sensor when prompted (Figure 85-1), repeating the process to add additional fingerprints if required.

Adding the Biometric Permission to the Manifest File
Biometric authentication requires that the app request the USE_BIOMETRIC permission within the project manifest file. Within the Android Studio Project tool window, locate and edit the app -> manifests -> AndroidManifest.xml file to add the permission request as follows:
<?xml version="1.0" encoding="utf-8"?>
<manifest xmlns:android="http://schemas.android.com/apk/res/android"
    package="com.ebookfrenzy.biometricdemo">

    <uses-permission
        android:name="android.permission.USE_BIOMETRIC" />
.
.Code language: HTML, XML (xml)
Designing the User Interface
To keep the example as simple as possible, the only visual element within the user interface will be a Button view. Locate and select the activity_main.xml layout resource file to load it into the Layout Editor tool.
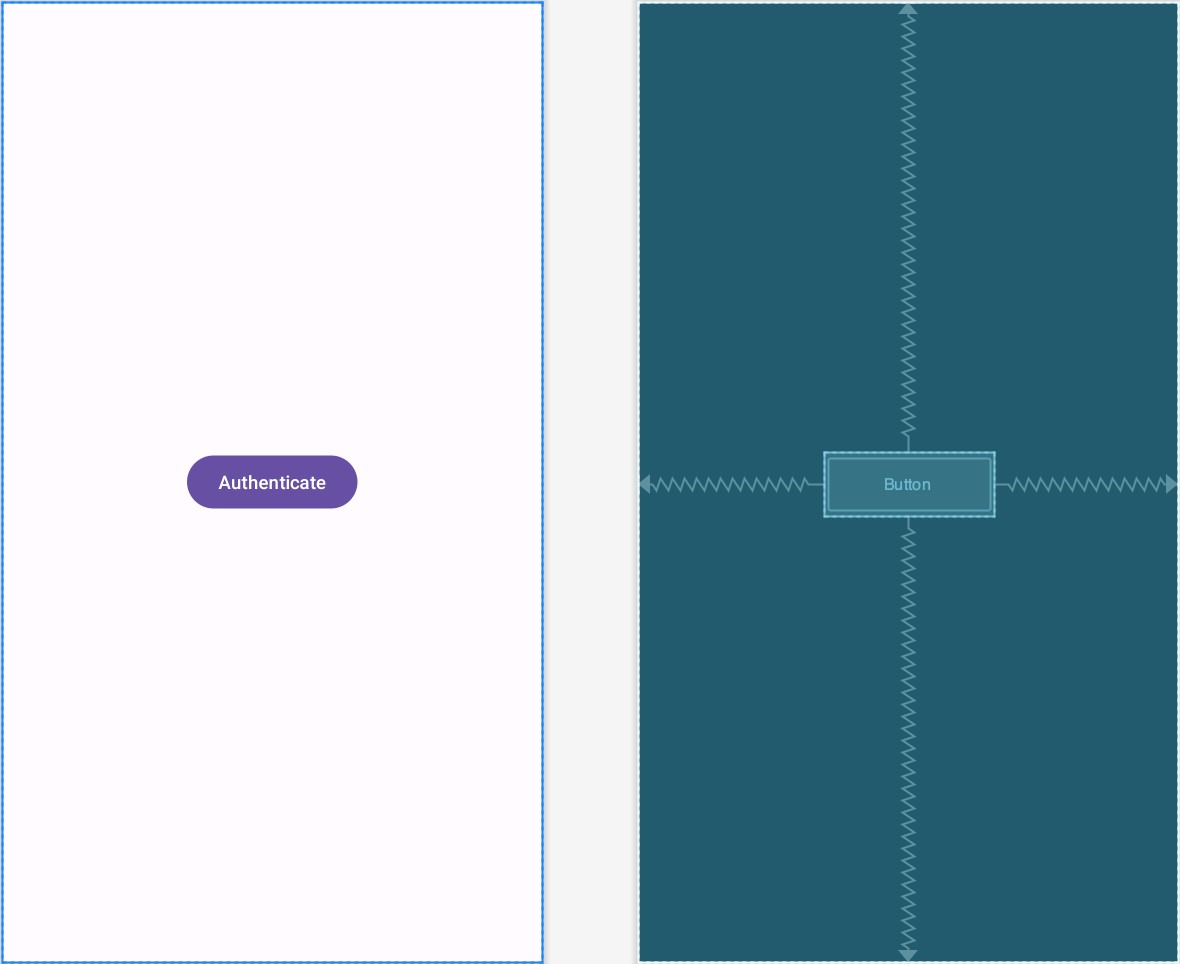
Delete the sample TextView object, drag and drop a Button object from the Common category of the palette and position it in the center of the layout canvas. Using the Attributes tool window, change the text property on the button to “Authenticate” and extract the string to a resource. Finally, configure the onClick property to call a method named authenticateUser.
On completion of the above steps, the layout should match that shown in Figure 85-2:

Adding a Toast Convenience Method
At various points throughout the code in this example, the app will be designed to display information to the user via Toast messages. Rather than repeat the same Toast code multiple times, a convenience method named notifyUser() will be added to the main activity. This method will accept a single String value and display it to the user as a Toast message. Edit the MainActivity.kt file now and add this method as follows:
.
.
import android.widget.Toast
.
.
private fun notifyUser(message: String) {
    Toast.makeText(this,
            message,
            Toast.LENGTH_LONG).show()
}Code language: Kotlin (kotlin)
Checking the Security Settings
Earlier in this chapter, steps were taken to configure the lock screen and register fingerprints on the device or emulator on which the app will be tested. It is important, however, to include defensive code in the app to ensure these requirements have been met before attempting to seek fingerprint authentication. These steps will be performed within the onCreate method residing in the MainActivity.kt file, using the Keyguard and PackageManager manager services. Note that code has also been added to verify that the USE_BIOMETRIC permission has been configured for the app:
.
.
import androidx.core.app.ActivityCompat
import android.Manifest
import android.app.KeyguardManager
import android.content.Context
import android.content.pm.PackageManager
.
.
class MainActivity : AppCompatActivity() {

    override fun onCreate(savedInstanceState: Bundle?) {
        super.onCreate(savedInstanceState)
        setContentView(R.layout.activity_biometric_demo)

        checkBiometricSupport()
    }

    private fun checkBiometricSupport(): Boolean {

        val keyguardManager = getSystemService(Context.KEYGUARD_SERVICE)
                                          as KeyguardManager

        if (!keyguardManager.isKeyguardSecure) {

            notifyUser("Lock screen security not enabled in Settings")
            return false
        }

        if (ActivityCompat.checkSelfPermission(this,
                        Manifest.permission.USE_BIOMETRIC) !=
                                PackageManager.PERMISSION_GRANTED) {

            notifyUser("Fingerprint authentication permission not enabled")
            return false
        }

        return if (packageManager.hasSystemFeature(
                    PackageManager.FEATURE_FINGERPRINT)) {
            true
        } else true
    }
.
.
}Code language: Kotlin (kotlin)
The above code changes begin by using the Keyguard manager to verify that a backup screen unlocking method has been configured (in other words, a PIN or other authentication method can be used as an alternative to fingerprint authentication to unlock the screen). If the lock screen is not secured, the code reports the problem to the user and returns from the method.
The method then checks that the user has biometric authentication permission enabled for the app before using the package manager to verify that fingerprint authentication is available on the device.
Configuring the Authentication Callbacks
When the biometric prompt dialog is configured, it will need to be assigned a set of authentication callback methods that can be called to notify the app of the success or failure of the authentication process. These methods need to be wrapped in a BiometricPrompt.AuthenticationCallback class instance. Remaining in the MainActivity.kt file, add a method to create and return an instance of this class with the appropriate methods implemented:
.
.
import android.hardware.biometrics.BiometricPrompt
.
.
private val authenticationCallback: BiometricPrompt.AuthenticationCallback
    get() = object : BiometricPrompt.AuthenticationCallback() {
        override fun onAuthenticationError(errorCode: Int,
                                           errString: CharSequence) {
            super.onAuthenticationError(errorCode, errString)
            notifyUser("Authentication error: $errString")
        }

        override fun onAuthenticationHelp(helpCode: Int,
                                 helpString: CharSequence) {
            super.onAuthenticationHelp(helpCode, helpString)
        }

        override fun onAuthenticationFailed() {
            super.onAuthenticationFailed()
            notifyUser("Authentication Failed")
        }

        override fun onAuthenticationSucceeded(result:
                     BiometricPrompt.AuthenticationResult) {
            super.onAuthenticationSucceeded(result)
            notifyUser("Authentication Succeeded")

        }
    }
.
.Code language: Kotlin (kotlin)
Adding the CancellationSignal
Once initiated, the biometric authentication process is performed independently of the app. To provide the app with a way to cancel the operation, an instance of the CancellationSignal class is created and passed to the biometric authentication process. This CancellationSignal instance can then be used to cancel the process if necessary. The cancellation signal instance may be configured with a listener, which will be called when the cancellation is completed. Add a new method to the activity class to configure and return a CancellationSignal object as follows:
.
.
import android.os.CancellationSignal
.
.
private var cancellationSignal: CancellationSignal? = null
.
.
private fun getCancellationSignal(): CancellationSignal {

    cancellationSignal = CancellationSignal()
    cancellationSignal?.setOnCancelListener {
        notifyUser("Cancelled via signal")
    }
    return cancellationSignal as CancellationSignal
}
.
.Code language: Kotlin (kotlin)
Starting the Biometric Prompt
All that remains is to add code to the authenticateUser() method to create and configure a BiometricPrompt instance and initiate the authentication. Add the authenticateUser() method as follows:
.
.
import android.view.View
.
.
fun authenticateUser(view: View) {
    val biometricPrompt = BiometricPrompt.Builder(this)
            .setTitle("Biometric Demo")
            .setSubtitle("Authentication is required to continue")
            .setDescription("This app uses biometric authentication to protect your data.")
            .setNegativeButton("Cancel", this.mainExecutor)
                { _, _ ->
                    notifyUser("Authentication cancelled") }.build()

    biometricPrompt.authenticate(getCancellationSignal(), mainExecutor,
                         authenticationCallback)
}Code language: Kotlin (kotlin)
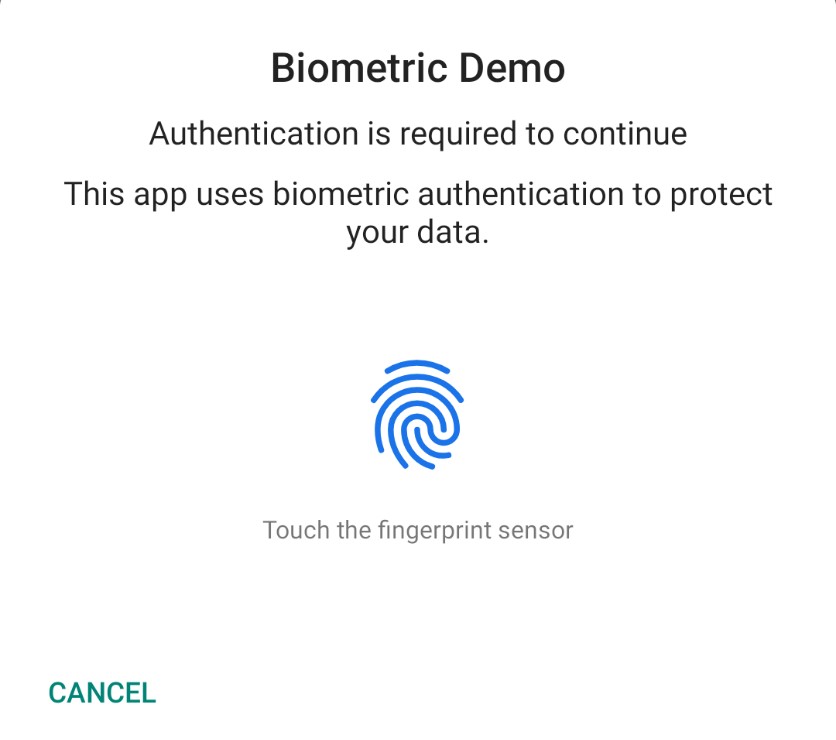
The BiometricPrompt.Builder class creates a new BiometricPrompt instance configured with title, subtitle, and description text to appear in the prompt dialog. The negative button is configured to display text which reads “Cancel” and a listener is configured to display a message when this button is clicked. Finally, the authenticate() method of the BiometricPrompt instance is called and passed the AuthenticationCallback and CancellationSignal instances. The Biometric prompt also needs to know which thread to perform the authentication on. This is defined by passing through an Executor object configured for the required thread. In this case, the getMainExecutor() method is used to pass a main Executor object to the BiometricPrompt instance so that the authentication process occurs on the app’s main thread.
Testing the Project
With the project now complete, run the app on a physical Android device or emulator session and click on the Authenticate button to display the BiometricPrompt dialog as shown in Figure 85-3:

Once running, either touch the fingerprint sensor or use the extended controls panel within the emulator to simulate a fingerprint touch as outlined in the chapter entitled Using and Configuring the Android Studio AVD Emulator. Assuming a registered fingerprint is detected, the prompt dialog will return to the main activity, where the toast message from the successful authentication callback method will appear.
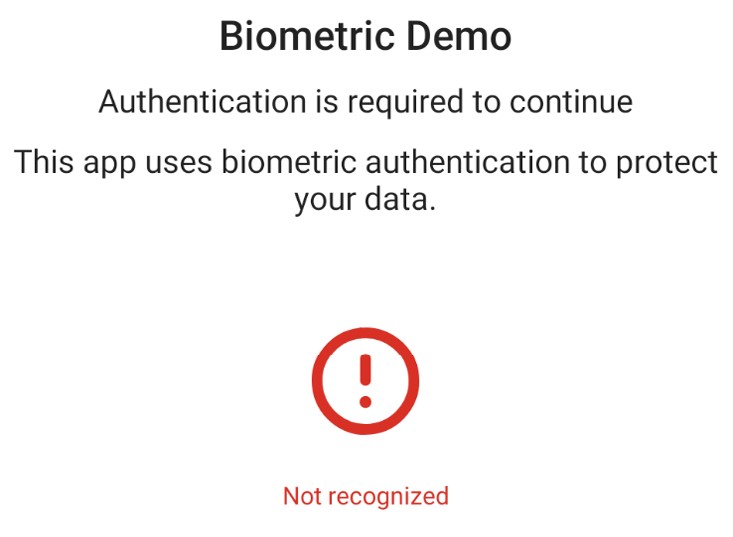
Click the Authenticate button again, using an unregistered fingerprint to attempt the authentication. This time the biometric prompt dialog will indicate that the fingerprint was not recognized:

Verify that the error handling callback works by clicking on the activity outside the biometric prompt dialog. The prompt dialog will disappear, and the toast message will appear with the following message:
Authentication error: Fingerprint operation cancelled by user.Code language: plaintext (plaintext)Check that canceling the prompt dialog using the Cancel button triggers the “Authentication Canceled” toast message. Finally, attempt to authenticate multiple times using an unregistered fingerprint and note that after several attempts, the prompt dialog indicates that too many failures have occurred and that future attempts cannot be made until later.
Summary
This chapter has outlined how to integrate biometric authentication into an Android app project. This involves using the BiometricPrompt class, which automatically handles most of the authentication process once configured with appropriate message text and callbacks.

