The term “gesture” is used to define a contiguous sequence of interactions between the touch screen and the user. A typical gesture begins at the point that the screen is first touched and ends when the last finger or pointing device leaves the display surface. When correctly harnessed, gestures can be implemented as a form of communication between user and application. Swiping motions to turn the pages of an eBook, or a pinching movement involving two touches to zoom in or out of an image are prime examples of how gestures can be used to interact with an application.
Compose gesture detection
Jetpack Compose provides mechanisms for the detection of common gestures within an application. In this chapter, we will cover a variety of gesture types including tap (click), double-tap, long press, and dragging, as well as multi-touch gestures such as panning, zooming, and rotation. Swipe gestures are also supported but require a little extra explanation, so will be covered independently in the next chapter.
In several instances, Compose provides two ways to detect gestures. One approach involves the use of gesture detection modifiers which provide gesture detection capabilities with built-in visual effects. An alternative option is to use the functions provided by the PointerInputScope interface which require extra coding but provide more advanced gesture detection capabilities. Where available, both of these options will be covered in this chapter.
This chapter will take a practical approach to exploring gesture detection by creating an Android Studio project that includes examples of the types of gesture detection.
Creating the GestureDemo project
Launch Android Studio and create a new Empty Compose Activity project named GestureDemo, specifying com.example.gesturedemo as the package name, and selecting a minimum API level of API 26: Android 8.0 (Oreo). Within the MainActivity.kt file, delete the Greeting function and add a new empty composable named MainScreen:
 |
You are reading a sample chapter from an old edition of the Jetpack Compose Essentials book. Purchase the fully updated Jetpack Compose 1.7 Essentials edition of this book in eBook or Print format. The full book contains 67 chapters and over 700 pages of in-depth information. Buy the full book now in Print or eBook format. Learn more. |
@Composable
fun MainScreen() {

}Code language: Kotlin (kotlin)
Next, edit the onCreateActivity() method and DefaultPreview function to call MainScreen instead of Greeting.
Detecting click gestures
Click gestures, also known as taps, can be detected on any visible composable using the clickable modifier. This modifier accepts a trailing lambda containing the code to be executed when a click is detected on the component to which it has been applied, for example:
SomeComposable(
    modifier = Modifier.clickable { /* Code to be executed */ }
)Code language: Kotlin (kotlin)
Within the MainActivity.kt file, add a new composable named ClickDemo and call it from the MainScreen function:
.
.
import androidx.compose.foundation.*
import androidx.compose.foundation.gestures.*
import androidx.compose.foundation.layout.*
import androidx.compose.runtime.*
import androidx.compose.ui.graphics.*
import androidx.compose.ui.unit.dp
.
.
@Composable
fun MainScreen() {
    ClickDemo()
}

@Composable
fun ClickDemo() {

    var colorState by remember { mutableStateOf(true)}
    var bgColor by remember { mutableStateOf(Color.Blue) }

    val clickHandler = {

        colorState = !colorState

        if (colorState == true) {
            bgColor = Color.Blue
        }
        else {
            bgColor = Color.DarkGray
        }
    }

    Box(
        Modifier
            .clickable { clickHandler() }
            .background(bgColor)
            .size(100.dp)
    )
}Code language: Kotlin (kotlin)
The ClickDemo composable contains a Box component the background color if which is controlled by the bgColor state. The Box also has applied to it a clickable modifier configured to call clickHandler which, in turn, toggles the current value of colorState and uses it to switch the current bgColor value between blue and gray.
Use the Preview panel in interactive mode to test that clicking the Box causes the background color to change.
 |
You are reading a sample chapter from an old edition of the Jetpack Compose Essentials book. Purchase the fully updated Jetpack Compose 1.7 Essentials edition of this book in eBook or Print format. The full book contains 67 chapters and over 700 pages of in-depth information. Buy the full book now in Print or eBook format. Learn more. |
Detecting taps using PointerInputScope
While the clickable modifier is useful for detecting simple click gestures, it cannot distinguish between taps, presses, long presses, and double taps. For this level of precision, we need to utilize the detectTapGestures() function of PointerInputScope. This is applied to a composable via the pointerInput() modifier, which gives us access to the PointerInputScope as follows:
SomeComposable(
    Modifier
        .pointerInput(Unit) {
            detectTapGestures(
                onPress = { /* Press Detected */ },
                onDoubleTap = { /* Double Tap Detected */ },
                onLongPress = { /* Long Press Detected */ },
                onTap = { /* Tap Detected */ }
            )
        }
)Code language: Kotlin (kotlin)
Edit the MainActivity.kt file as follows to add and call a composable named TapPressDemo:
.
.
import androidx.compose.ui.Alignment
import androidx.compose.ui.input.pointer.pointerInput
.
.
@Composable
fun MainScreen() {
    TapPressDemo()
}

@Composable
fun TapPressDemo() {

    var textState by remember {
        mutableStateOf("Waiting ....")
    }

    val tapHandler = { status : String ->
        textState = status

    }
    Column(
        horizontalAlignment = Alignment.CenterHorizontally,
        modifier = Modifier.fillMaxSize()
    ) {
        Box(
            Modifier
                .padding(10.dp)
                .background(Color.Blue)
                .size(100.dp)
                .pointerInput(Unit) {
                    detectTapGestures(
                        onPress = { tapHandler("onPress Detected") },
                        onDoubleTap = { tapHandler("onDoubleTap Detected") },
                        onLongPress = { tapHandler("onLongPress Detected") },
                        onTap = { tapHandler("onTap Detected") }
                    )
                }
        )
        Spacer(Modifier.height(10.dp))
        Text(textState)
    }
}Code language: Kotlin (kotlin)
The TapPressDemo composable contains Box and Text components within a Column parent. The string displayed on the Text component is based on the current textState value. When a gesture is detected by the detectTapGestures() function, the tapHandler is called and passed a new string describing the type of gesture detected. This string is assigned to textState causing it to appear in the Text component. Refresh the Preview panel and use interactive mode to experiment with different tap and press gestures. While running, the user interface should match that shown in Figure 47-1:
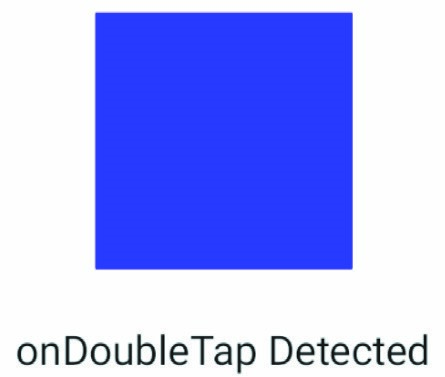
Figure 47-1
Detecting drag gestures
Drag gestures on a component can be detected by applying the draggable() modifier. This modifier stores the offset (or delta) of the drag motion from the point of origin as it occurs and stores it in a state, an instance of which can be created via a call to the rememberDraggableState() function. This state can then, for example, be used to move the position of the dragged component in coordination with the gesture. The draggable() call also needs to be told whether to detect horizontal or vertical gestures.
 |
You are reading a sample chapter from an old edition of the Jetpack Compose Essentials book. Purchase the fully updated Jetpack Compose 1.7 Essentials edition of this book in eBook or Print format. The full book contains 67 chapters and over 700 pages of in-depth information. Buy the full book now in Print or eBook format. Learn more. |
To see the draggable() modifier in action, make the following changes to the MainActivity.kt file:
.
.
import androidx.compose.ui.unit.IntOffset

import kotlin.math.roundToInt
.
.
@Composable
fun MainScreen() {
    DragDemo()
}

@Composable
fun DragDemo() {

    Box(modifier = Modifier.fillMaxSize()) {

        var xOffset by remember { mutableStateOf(0f) }

        Box(
            modifier = Modifier
                .offset { IntOffset(xOffset.roundToInt(), 0) }
                .size(100.dp)
                .background(Color.Blue)
                .draggable(
                    orientation = Orientation.Horizontal,
                    state = rememberDraggableState { distance ->
                        xOffset += distance
                    }
                )
        )
    }
}Code language: Kotlin (kotlin)
The example creates a state to store the current x-axis offset and uses it as the x-coordinate of the draggable Box:
var xOffset by remember { mutableStateOf(0f) }
.
.
Box(
    modifier = Modifier
        .offset { IntOffset(xOffset.roundToInt(), 0) }Code language: Kotlin (kotlin)
The draggable modifier is then applied to the Box with the orientation parameter set to horizontal. The state parameter is set by calling the rememberDraggableState() function, the trailing lambda for which is used to obtain the current delta value and add it to the xOffset state. This, in turn, causes the box to move in the direction of the drag gesture:
.draggable(
    orientation = Orientation.Horizontal,
    state = rememberDraggableState { distance ->
        xOffset += distance
    }
)Code language: Kotlin (kotlin)
Preview the design and test that the Box can be dragged horizontally left and right:

Figure 47-2
 |
You are reading a sample chapter from an old edition of the Jetpack Compose Essentials book. Purchase the fully updated Jetpack Compose 1.7 Essentials edition of this book in eBook or Print format. The full book contains 67 chapters and over 700 pages of in-depth information. Buy the full book now in Print or eBook format. Learn more. |
The draggable() modifier is only useful for supporting drag gestures in either the horizontal or vertical plane. To support multi-directional drag operations, the PointerInputScope detectDragGestures function needs to be used.
Detecting drag gestures using PointerInputScope
The PointerInputScope detectDragGestures function allows us to support both horizontal and vertical drag operations simultaneously and can be implemented using the following syntax:
SomeComposable() {
    .pointerInput(Unit) {
        detectDragGestures { _, distance ->
            xOffset += distance.x
            yOffset += distance.y
        }
    }Code language: Kotlin (kotlin)
To see this in action, add and call a new function named PointerInputDrag in the MainActivity.kt file as follows:
@Composable
fun MainScreen() {
    PointerInputDrag()
}

@Composable
fun PointerInputDrag() {

    Box(modifier = Modifier.fillMaxSize()) {

        var xOffset by remember { mutableStateOf(0f) }
        var yOffset by remember { mutableStateOf(0f) }

        Box(
            Modifier
                .offset { IntOffset(xOffset.roundToInt(), yOffset.roundToInt()) }
                .background(Color.Blue)
                .size(100.dp)
                .pointerInput(Unit) {
                    detectDragGestures { _, distance ->
                        xOffset += distance.x
                        yOffset += distance.y
                    }
                }
        )
    }
}Code language: Kotlin (kotlin)
Since we are supporting both horizontal and vertical dragging gestures, we have declared states to store both x and y offsets. The detectDragGestures lambda passes us an Offset object which we have named distance and from which we can obtain the latest drag x and y offset values. These are added to the xOffset and yOffset states respectively, causing the Box component to follow the dragging motion around the screen:
.pointerInput(Unit) {
    detectDragGestures { _, distance ->
        xOffset += distance.x
        yOffset += distance.y
    }
}Code language: Kotlin (kotlin)
Preview the design in interactive mode and test that it is possible to drag the box in any direction on the screen:
 |
You are reading a sample chapter from an old edition of the Jetpack Compose Essentials book. Purchase the fully updated Jetpack Compose 1.7 Essentials edition of this book in eBook or Print format. The full book contains 67 chapters and over 700 pages of in-depth information. Buy the full book now in Print or eBook format. Learn more. |
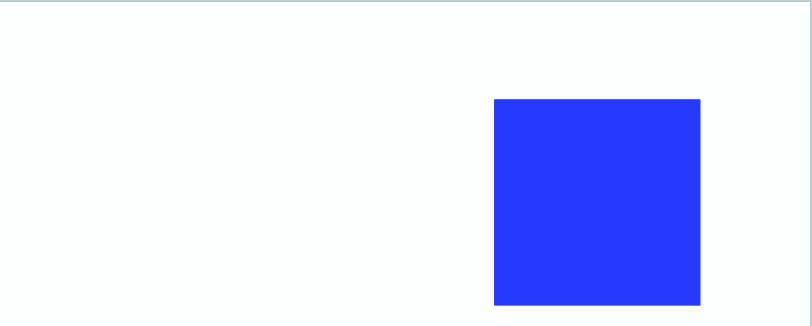
Figure 47-3
Scrolling using the scrollable modifier
Scrolling was introduced in the chapter entitled “An Overview of Lists and Grids in Compose” in relation to scrolling through lists of items. Using the scrollable() modifier, scrolling gestures are not limited to list components. As with the draggable() modifier, scrollable() is limited to support either horizontal or vertical gestures but not both in the same modifier declaration. Scrollable state is managed using the rememberScrollableState() function, the lambda for which gives us access to the distance traveled by the scroll gesture which can, in turn, be used to adjust the offset of one or more composables in the hierarchy. Make the following changes to implement scrolling in the MainActivity.kt file:
@Composable
fun MainScreen() {
    ScrollableModifier()
}

@Composable
fun ScrollableModifier() {

    var offset by remember { mutableStateOf(0f) }

    Box(
        Modifier
            .fillMaxSize()
            .scrollable(
                orientation = Orientation.Vertical,
                state = rememberScrollableState { distance ->
                    offset += distance
                    distance
                }
            )
    ) {
        Box(modifier = Modifier
            .size(90.dp)
            .offset { IntOffset(0, offset.roundToInt()) }
            .background(Color.Red))
    }
}Code language: Kotlin (kotlin)
Preview the new composable and click and drag vertically on the screen. Note that the red box scrolls up and down in response to vertical scrolling gestures.
Scrolling using the scroll modifiers
As we saw in the previous example, the scrollable() modifier can only detect scrolling in a single orientation. To detect both horizontal and vertical scrolling, we need to use the scroll modifiers. These are essentially two modifiers named verticalScroll() and horizontalScroll() both of which must be passed a scroll state created via a call to the rememberScrollState() function, for example:
SomeComposable(modifier = Modifier
    .verticalScroll(rememberScrollState())
    .horizontalScroll(rememberScrollState())) {
}Code language: Kotlin (kotlin)
In addition to supporting scrolling in both orientations, the scroll functions also have the advantage that they handle the actual scrolling. This means that we do not need to write code to apply new offsets to implement the scrolling behavior.
 |
You are reading a sample chapter from an old edition of the Jetpack Compose Essentials book. Purchase the fully updated Jetpack Compose 1.7 Essentials edition of this book in eBook or Print format. The full book contains 67 chapters and over 700 pages of in-depth information. Buy the full book now in Print or eBook format. Learn more. |
To demonstrate these modifiers, we will use a Box composable containing an image. The Box will be sized to act as a “viewport” through which only part of the image can be seen at any one time. We will, instead, use scrolling to allow the image to be scrolled within the box.
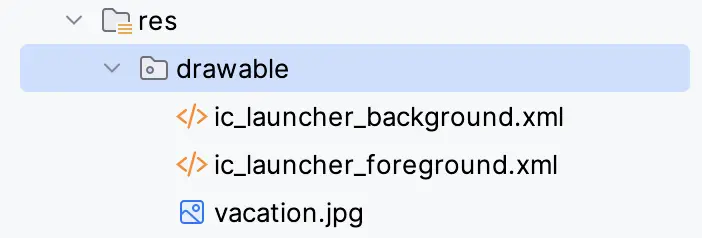
The first step is to add an image resource to the project. In previous chapters, we used the Resource Manager to add an image to the project resources. As we will demonstrate in this chapter, it is also possible to copy and paste an image file directly into the drawables folder within the Project tool window.
The image that will be used for the project is named vacation.jpg and can be found in the images folder of the sample code download available from the following URL:
https://www.ebookfrenzy.com/web/compose14/index.php
Locate the image in the file system navigator for your operating system and select and copy it. Right-click on the app -> res -> drawable entry in the Project tool window and select Paste from the resulting menu to add the file to the folder:
 |
You are reading a sample chapter from an old edition of the Jetpack Compose Essentials book. Purchase the fully updated Jetpack Compose 1.7 Essentials edition of this book in eBook or Print format. The full book contains 67 chapters and over 700 pages of in-depth information. Buy the full book now in Print or eBook format. Learn more. |
Next, modify the MainActivity.kt file as follows:
.
.
import androidx.compose.ui.geometry.Offset
import androidx.compose.ui.res.imageResource
.
.
@Composable
fun MainScreen() {
    ScrollModifiers()
}

@Composable
fun ScrollModifiers() {

    val image = ImageBitmap.imageResource(id = R.drawable.vacation)

    Box(modifier = Modifier
        .size(150.dp)
        .verticalScroll(rememberScrollState())
        .horizontalScroll(rememberScrollState())) {
        Canvas(
            modifier = Modifier
                .size(360.dp, 270.dp)
        )
        {
            drawImage(
                image = image,
                topLeft = Offset(
                    x = 0f,
                    y = 0f
                ),
            )
        }
    }
}Code language: Kotlin (kotlin)
When previewed in interactive mode, only part of the image will be visible within the Box component. Clicking and dragging on the image will allow you to move the photo so that other areas of the image can be viewed:

Figure 47-5
Detecting pinch gestures
The remainder of this chapter will look at gestures that require multiple touch-points on the screen, beginning with pinch gestures. Pinch gestures are typically used to change the size (scale) of content and give the effect of zooming in and out. This type of gesture is detected using the transformable() modifier which takes as parameters a state of type TransformableState, an instance of which can be created by a call to the rememberTransformableState() function. This function accepts a trailing lambda to which are passed the following three parameters:
- Scale change – A Float value updated when pinch gestures are performed.
- Offset change – An Offset instance containing the current x and y offset values. This value is updated when a gesture causes the target component to move (referred to as translations).
- Rotation change – A Float value representing the current angle change when detecting rotation gestures.
All three of these parameters need to be declared when calling the rememberTransformationState() function, even if you do not make use of them in the body of the lambda. A typical TransformableState declaration that tracks scale changes might read as follows:
 |
You are reading a sample chapter from an old edition of the Jetpack Compose Essentials book. Purchase the fully updated Jetpack Compose 1.7 Essentials edition of this book in eBook or Print format. The full book contains 67 chapters and over 700 pages of in-depth information. Buy the full book now in Print or eBook format. Learn more. |
var scale by remember { mutableStateOf(1f) }

val state = rememberTransformableState { scaleChange, offsetChange,
                                               rotationChange ->
    scale *= scaleChange
}Code language: Kotlin (kotlin)
Having created the state, it can then be used when calling the transformable() modifier on a composable as follows:
SomeComposable(modifier = Modifier
                           .transformable(state = state) {
}Code language: Kotlin (kotlin)
As the pinch gesture progresses, the scale state will be updated. To reflect these changes we will need to make sure that the composable also changes in size. We can do this by accessing the graphics layer of the composable and setting the scaleX and scaleY properties to the current scale state. As we will demonstrate later, the rotation and translation transformations will also require access to the graphics layer.
Start this phase of the tutorial by making the following changes to the MainActivity.kt file to implement pinch gesture detection:
@Composable
fun MainScreen() {
    MultiTouchDemo()
}

@Composable
fun MultiTouchDemo() {

    var scale by remember { mutableStateOf(1f) }

    val state = rememberTransformableState {
                  scaleChange, offsetChange, rotationChange ->
        scale *= scaleChange
    }

    Box(contentAlignment = Alignment.Center, modifier = Modifier.fillMaxSize()) {
        Box(
            Modifier
                .graphicsLayer(
                    scaleX = scale,
                    scaleY = scale,
                )
                .transformable(state = state)
                .background(Color.Blue)
                .size(100.dp)
        )
    }
}Code language: Kotlin (kotlin)
To test out the pinch gesture the app will need to be run on a device or emulator because the Preview panel does not yet appear to support multi-touch gestures). Once running, perform a pinch gesture on the blue box to zoom in and out. If you are using an emulator, hold the keyboard Ctrl key (Cmd on macOS) while clicking and dragging to simulate multiple touches.
Detecting rotation gestures
We can now add rotation support to the example with just three additional lines of code:
 |
You are reading a sample chapter from an old edition of the Jetpack Compose Essentials book. Purchase the fully updated Jetpack Compose 1.7 Essentials edition of this book in eBook or Print format. The full book contains 67 chapters and over 700 pages of in-depth information. Buy the full book now in Print or eBook format. Learn more. |
@Composable
fun MultiTouchDemo() {

    var scale by remember { mutableStateOf(1f) }
    var angle by remember { mutableStateOf(0f) }

    val state = rememberTransformableState {
           scaleChange, offsetChange, rotationChange ->
        scale *= scaleChange
        angle += rotationChange
    }

    Box(contentAlignment = Alignment.Center, modifier = Modifier.fillMaxSize()) {
        Box(
            Modifier
                .graphicsLayer(
                    scaleX = scale,
                    scaleY = scale,
                    rotationZ = angle
                )
                .transformable(state = state)
                .background(Color.Blue)
                .size(100.dp)
        )
    }
}Code language: Kotlin (kotlin)
Compile and run the app and perform both pinch and rotation gestures. Both the size and angle of the Box should now change:
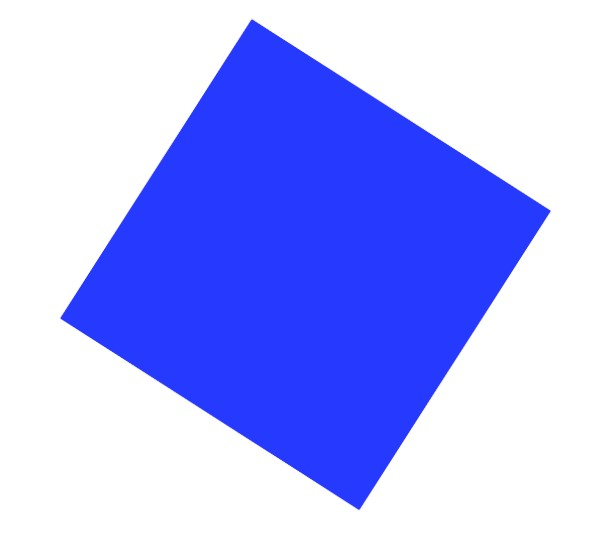
Figure 47-6
Detecting translation gestures
Translation involves the change in the position of a component. As with rotation detection, we can add translation support to our example with just a few lines of code:
@Composable
fun MultiTouchDemo() {

    var scale by remember { mutableStateOf(1f) }
    var angle by remember { mutableStateOf(0f) }
    var offset by remember { mutableStateOf(Offset.Zero)}

    val state = rememberTransformableState {
                  scaleChange, offsetChange, rotationChange ->
        scale *= scaleChange
        angle += rotationChange
        offset += offsetChange
    }

    Box(contentAlignment = Alignment.Center, modifier = Modifier.fillMaxSize()) {
        Box(
            Modifier
                .graphicsLayer(
                    scaleX = scale,
                    scaleY = scale,
                    rotationZ = angle,
                    translationX = offset.x,
                    translationY = offset.y
                )
                .transformable(state = state)
                .background(Color.Blue)
                .size(100.dp)
        )
    }
}Code language: Kotlin (kotlin)
Note that the translation gesture only works when testing on a physical device and requires two points of contact within the box to initiate. Also, since we are performing a pan gesture the box will move in the opposite direction to the gesture motion.
Summary
Gestures are a key form of interaction between the user and an app running on an Android device. Using the gesture detection features of Compose, it is possible to respond to a range of screen interactions including taps, long presses, scrolling, pinches, and rotations. Gestures are detected in Compose by applying modifiers to composables and responding to state changes.
 |
You are reading a sample chapter from an old edition of the Jetpack Compose Essentials book. Purchase the fully updated Jetpack Compose 1.7 Essentials edition of this book in eBook or Print format. The full book contains 67 chapters and over 700 pages of in-depth information. Buy the full book now in Print or eBook format. Learn more. |
